How to configure Gmail SMTP in your WordPress site?
Gmail SMTP server can make your life easier and that’s exactly what we are going to cover in this blog.

Among the most common use cases of triggering emails from your websites, password resets, user registration and contact forms top the list.
WordPress uses the PHP mail function to get this job done, which is not as reliable as most web hosts have imposed restrictions on the use of these functions.
SMTP stands for Simple Mail Transfer Protocol which uses proper Authentication that increases deliverability. Gmail provides SMTP services for mail sending and we can easily configure it with our website.
We have tried to outline a step-wise walkthrough for this whole configuration:
Step: 1
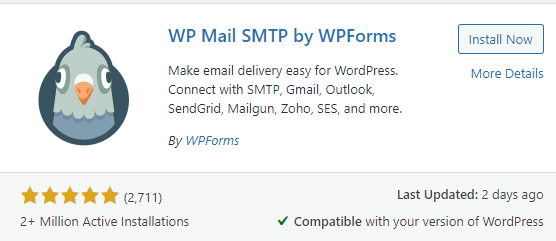
Install and Activate the “WP Mail SMTP” plugin from Add new plugin.
Step: 2
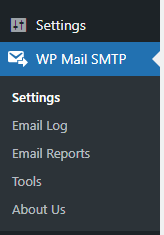
Go to WP Mail SMTP > Settings from the admin panel.
Step: 3
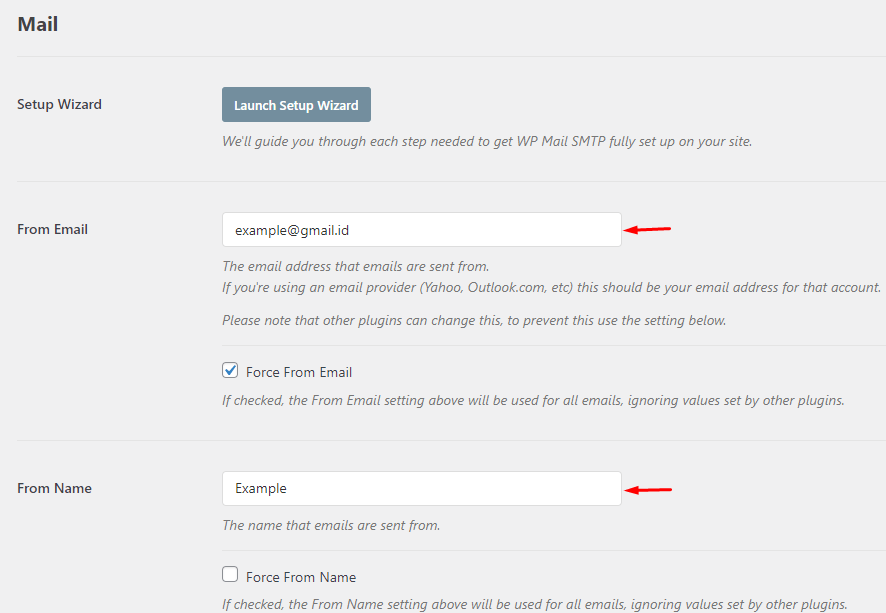
In the Mail section Fill in the details of your Gmail account.
Step: 4
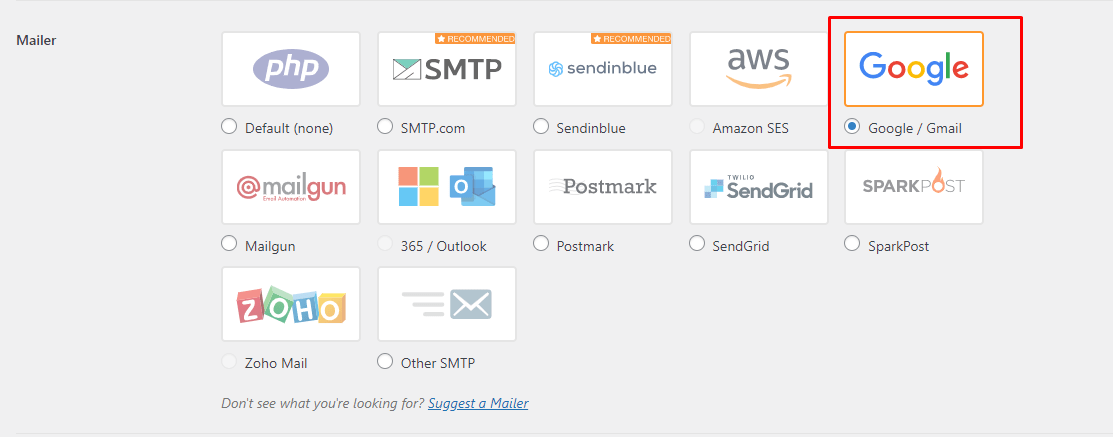
Go ahead and select Mailer Google/Gmail.
Step: 5
When you select Google/Gmail as a mailer It will ask you for Client Id and Secret.
Below are the steps to get the client Id and secret:
a) Open a New tab in your browser and browse to this link. It will redirect you to Google Cloud Platform where you can log in using your Gmail Account and click on CREATE PROJECT.

b) Insert Your Project Details and click on create.
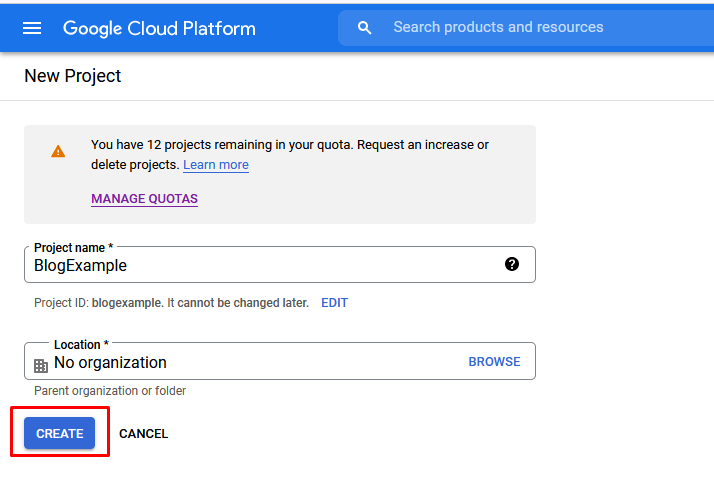
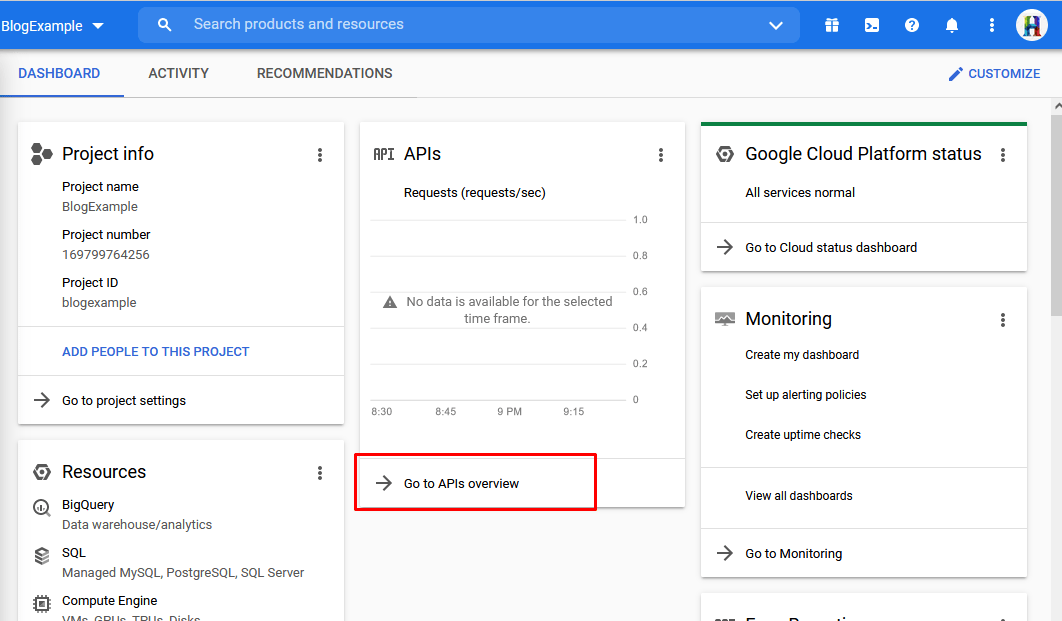
c) On Project Dashboard, Go to the API section and click on Go to APIs overview
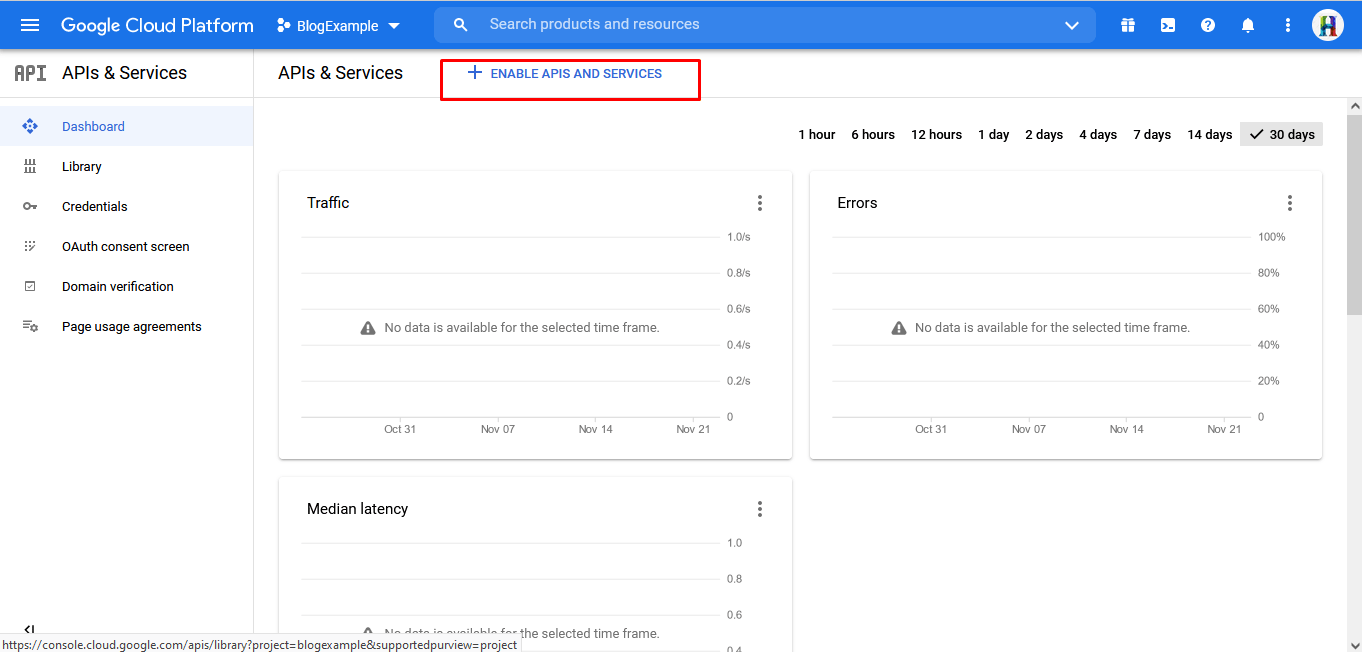
d) Click On + ENABLE APIS AND SERVICES, it will redirect to the API library.
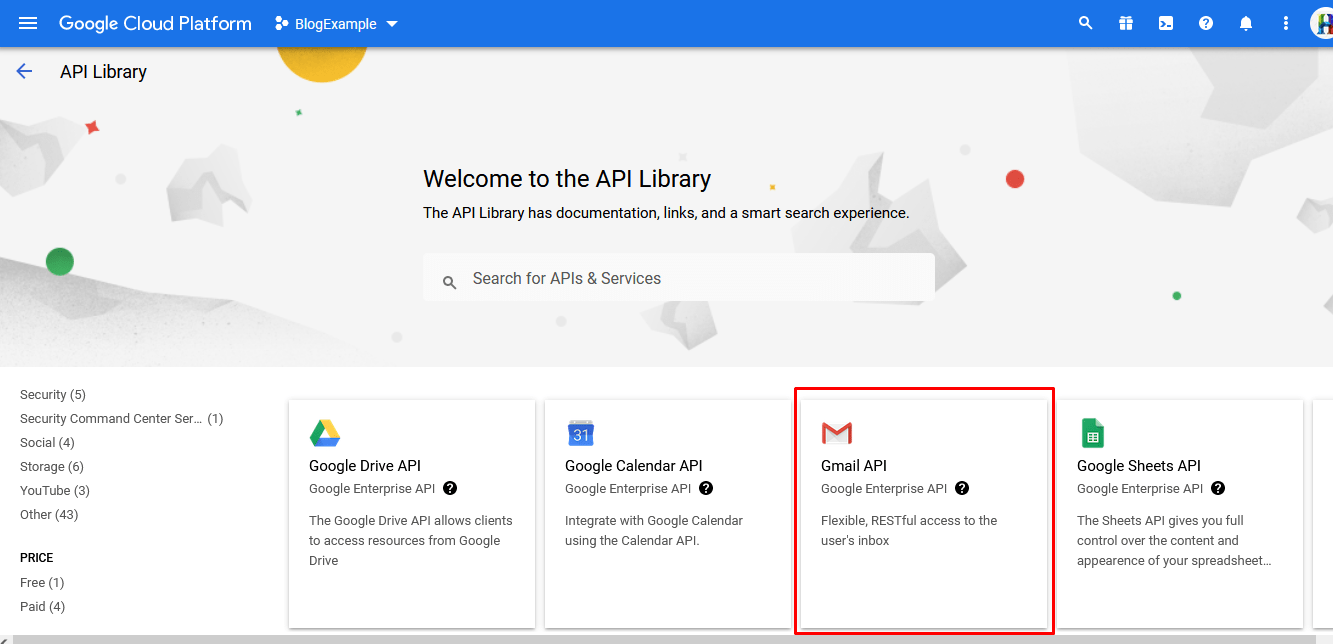
e) In the API library, Scroll down to Gmail API and Click it.
f) Click on the Enable Gmail API.
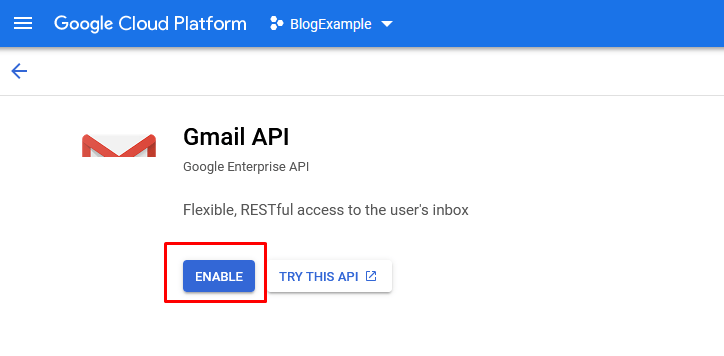
g) After enabling Gmail API, click on the CREATE CREDENTIALS button.

h)Start Steps of Create Credentials – Add Credential Type.
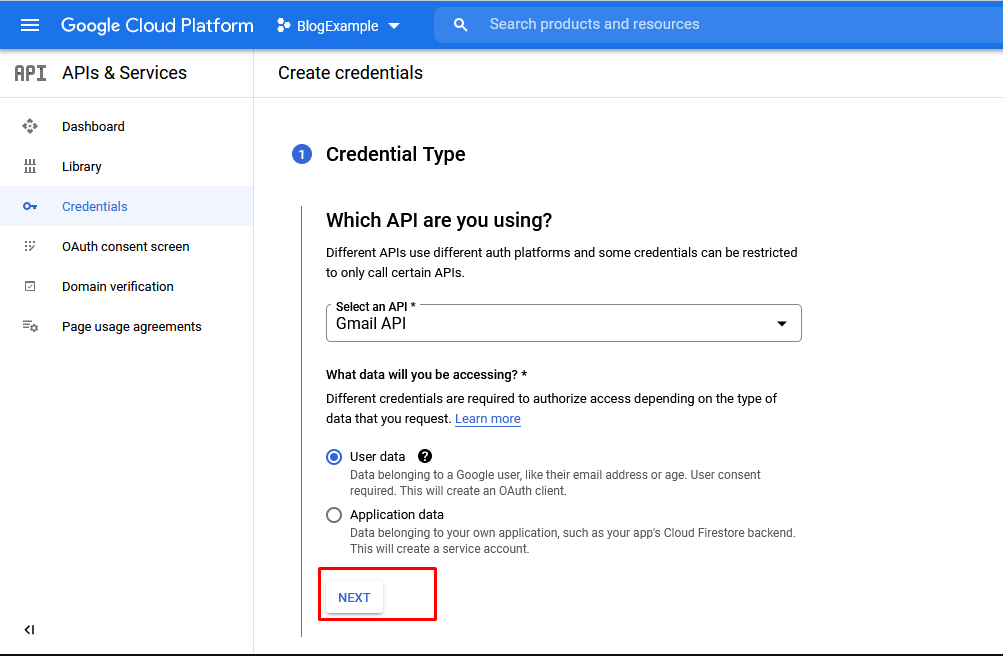
i) Scroll down and add the required information on the OAuth Consent Screen details and Save it.
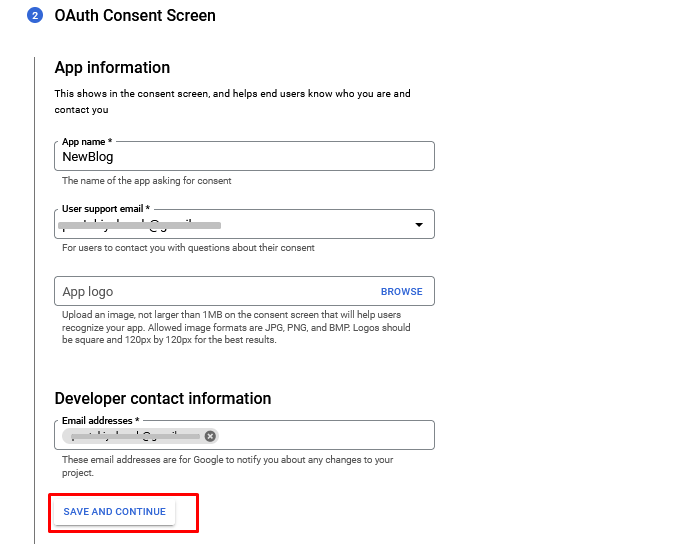
j) Skip Filling 3rd step and Save it and add details OAuth Client id details as below:
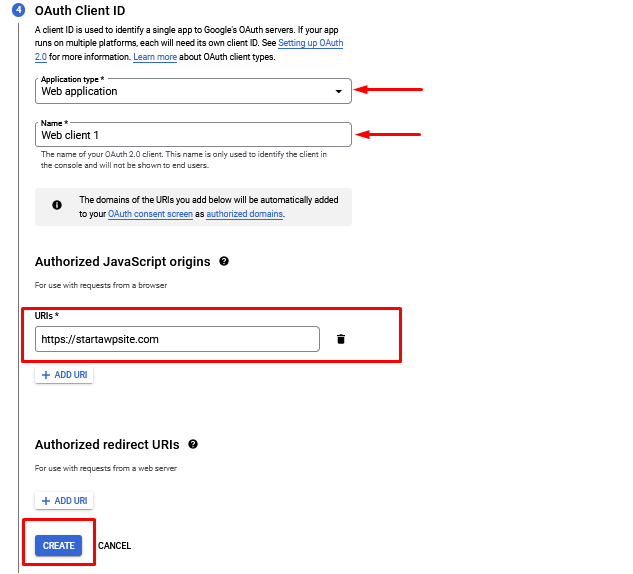
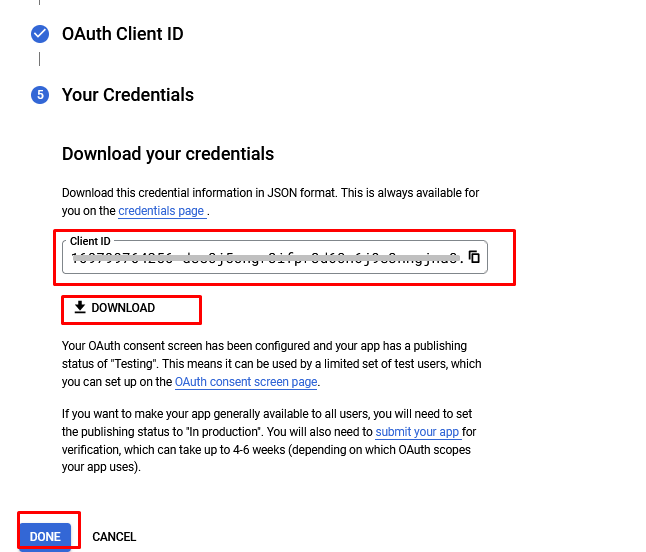
k) Now you get Your Credentials, you can copy or download credentials, Or just click DONE.
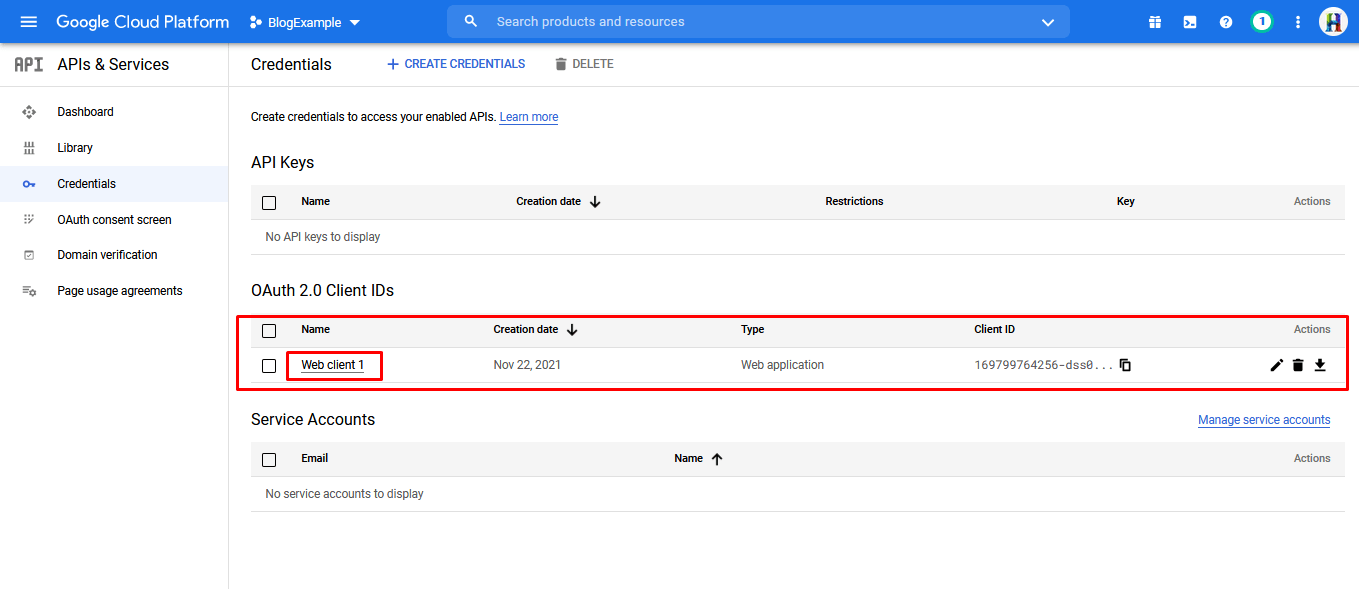
l) Click on your Client name
m) Here you get a client ID and Secret.
Now Go to WP Mail SMTP > Settings again and copy this ID and Secret.
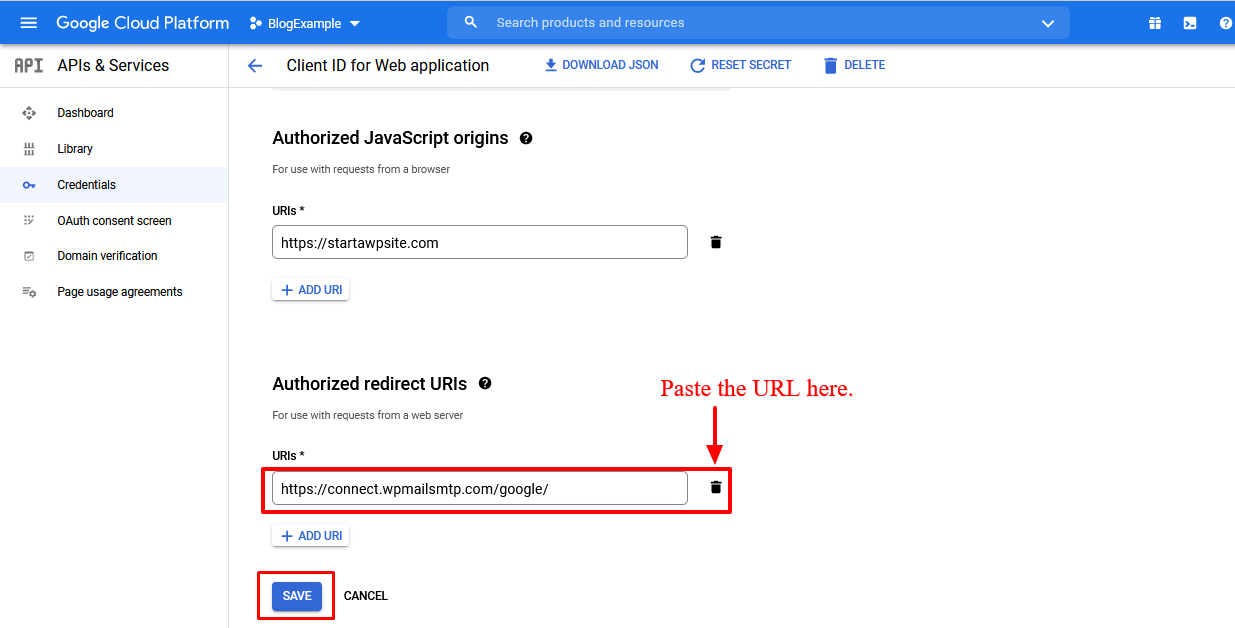
n) Copy this Authorized redirect URI.

o) Paste the copied URL to the above step-XIII (after scroll down) and Save.
Step: 6
Now get back to your WP Mail SMTP admin page. After filling in Client Id and Client Secret, click on Save, and after that Click on Allow Plugin to Send emails using your Google account.

Step: 7
After Successfully saving these details, set up your contact form and Email setting in the form.
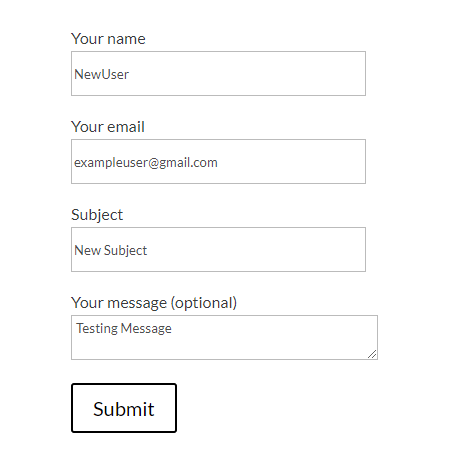
Step: 8
We are ready for mail now.

The Gmail SMTP has been configured properly and you can start seeing emails coming to your inbox. Happy configuring.
Also Read: Connecting WordPress Media Library to Google Drive made easy!!
Thank you for reading our blog. We believe you’ve found value in our ideas and processes. Erudite Works Pvt Ltd is a leading IT outsourcing services provider, committed to delivering exceptional results. Our expert team is dedicated to understanding clients’ unique needs, providing tailored solutions for significant business growth. With a proven track record, we’re here to help clients achieve their goals in the ever-changing digital landscape. For more about our services, feel free to Contact Us.




Truly when someone doesn’t be aware of afterward its up to other users that they will assist, so here it happens. ultraviolett ljus lampa teuhe.teswomango.com/map21.php